Start fast with React Three Fiber and Three.js
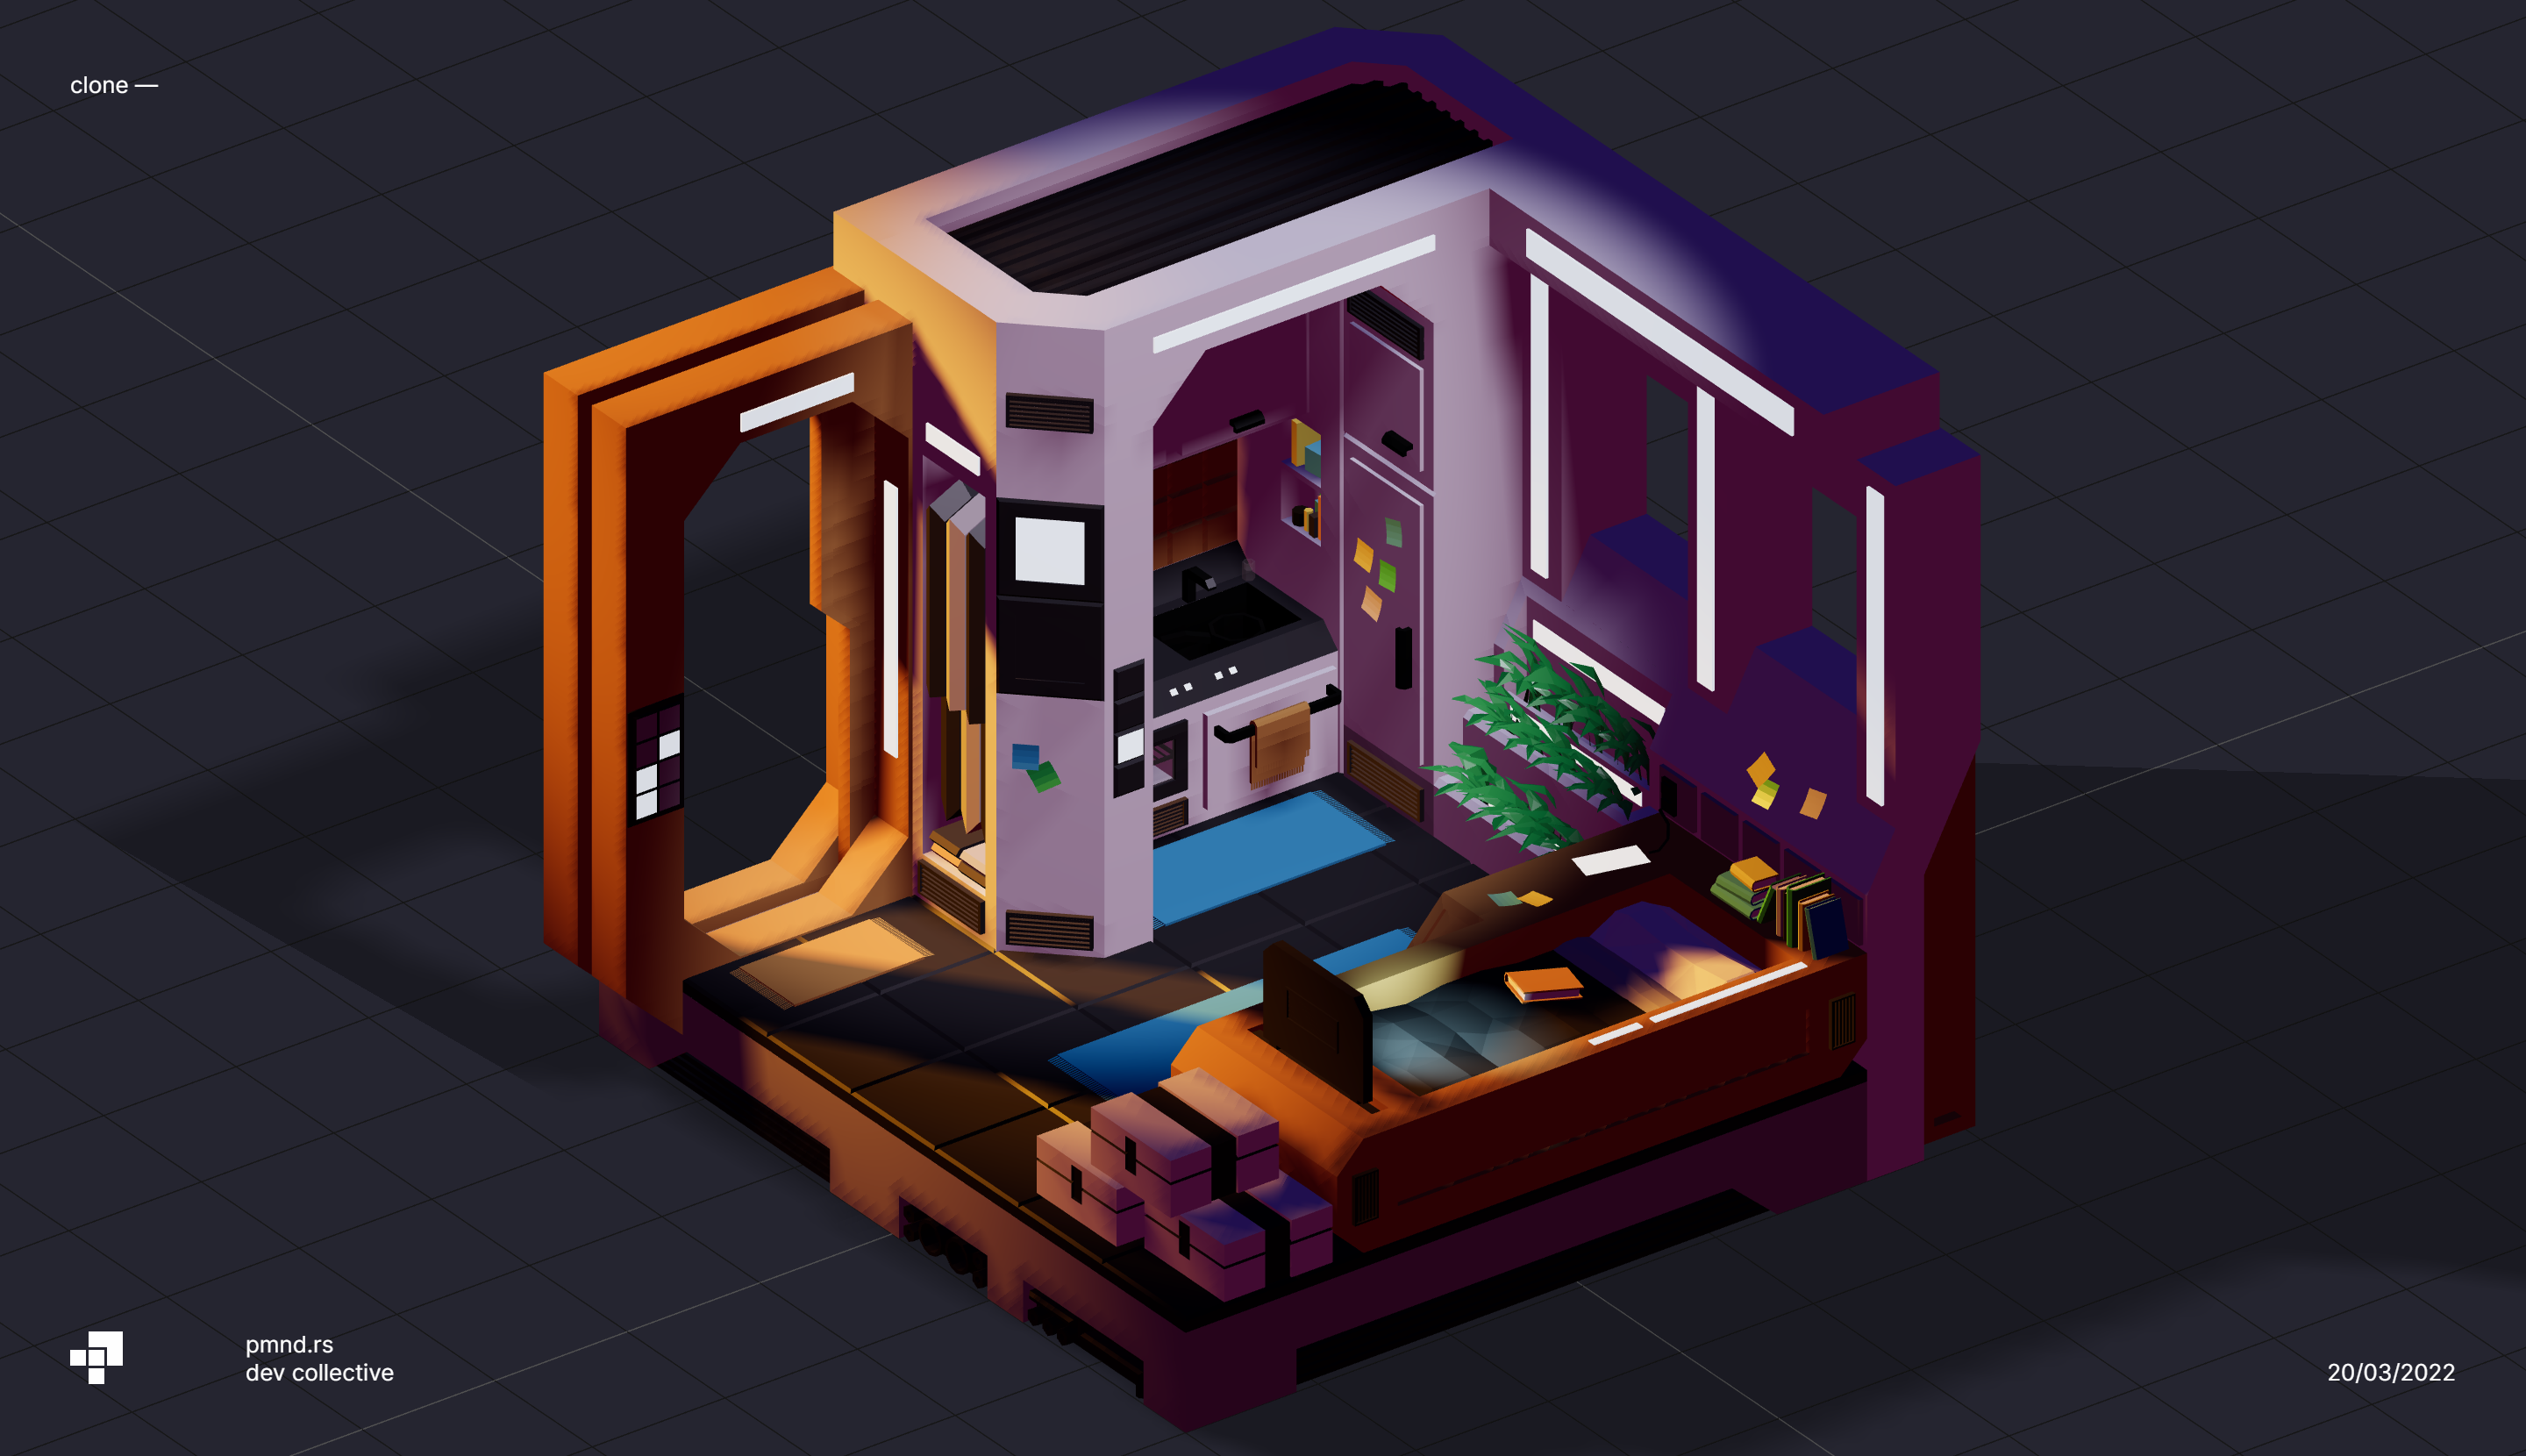
This’s an official example demo “Clones” from R3F documentation.
If you like React, you like interactive 3D webs and you want to make your own 3D experiences, then surely you are in the right place, this article serves a guide to fastly setup a react project with React Three Fiber.
If you’ve never heard about React Three Fiber I will summarize it for you: It is a React renderer for Three.js (awesome), this library allow us to create 3D experiences using the benefits of React and Three.js, how great is that? If you’ve never used Three.js this can be a starting point for learning Three.js as well.
In case someone needed it, Three.js is a library written in javascript that use WebGL’s interface to render graphics on web.
Before jumping into the commands and code, the author wants to tell everyone that the project will be in React.TS (because he likes Typescript 🤪).
What options do we have?
Long story short, there are plenty ways to start your project with React Three Fiber (We are going to call this R3F from now on) you should always pick the solution that suites best for you, in this case we’re going for a fast and not heavy setup:
In this article we’re going to use Vite, it requires less configuration to start using R3F.
Starting a project with Vite
Vite is a build tool that is agnostic to the framework - library of our frontend. (Read more about Vite)
Run the following command:
# npm 6.x
npm create vite@latest demor3f --template react-ts

# npm 7
npm create vite@latest demor3f -- --template react-ts

# yarn
yarn create vite demor3f --template react-ts
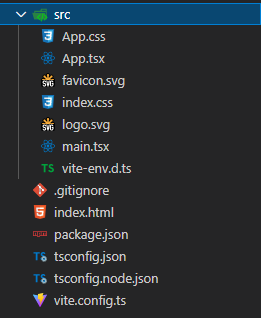
After completition your folder structure should look like this:
Let’s install our dependencies, R3F and Three.js:
npm install
npm install three @react-three/fiber

# If you're using typescript
npm install @types/three
Cleaning
There are many things that we’re not going to use, so go to App.tsx and let's do some cleaning
export default function App() {
  return (
    <div>
      <span>Hi</span>
    </div>
  );
}
Running
It's time to run your server, everything should be fine and vite will tell us the url and port where our project is running:
npm run dev
Open that direction in your browser and you should see “Hi”.
Perfect Cube (is this a Nanatsu no Taizai reference?)
Let’s go back to App.tsx to import a Canvas component from R3F, (any object that we want to render in our scene must be inside a Canvas component).
import { Canvas } from '@react-three/fiber';

export default function App() {
  return (
    <Canvas style={{ height: '100vh', width: '100%' }}>
      <ambientLight />
      <pointLight position={[10, 10, 10]} />
    </Canvas>
  );
}
Let’s review this changes:
-
First, we’re setting the height and width in our Canvas component to cover all the screen.
-
Second, there are two components (
<ambientLight />and<pointLight />) inside our Canvas, that’s because we need light in our scenes to see our objects, without light sources eveything will be dark (pretty realistic right?).
Easy-peasy, we still need to display something to verify that our lights work, we’re going to add our first cube:
import { Canvas } from '@react-three/fiber';

export default function App() {
  return (
    <Canvas style={{ height: '100vh', width: '100%' }}>
      <ambientLight />
      <pointLight position={[10, 10, 10]} />
      <mesh>
        <boxGeometry args={[1, 1, 1]} />
        <meshStandardMaterial color="#c6a7d2" />
      </mesh>
    </Canvas>
  );
}
To define our new mesh we added <mesh>...</mesh>, we added a <boxGeometry/>
to define a cube geometry of our object, we’re also usign a <meshStandardMaterial/>
to define the cube material with a color in hex.
If you’re asking: “What is a mesh? is it a fish? what is that material thing?”. Let's hit the brake for a moment to learn what these concepts mean:
A mesh it’s definetly not a fish but when we want to render something in 3D (e.g., our cube) we must offer detailed information of what we want to show on the screen:
-
Our cube mesh needs to have a geometry that indicates our program its composition (vertex, normals, faces, UVs in space...).
-
Our cube mesh also needs a material that indicates how that object is going to look, is it a metallic cube? glass cube? rubber cube?
After this changes you must be able to see a purple cube in your screen (at least one face), we are going to add rotation on every frame update and some scaling too, before that we should separate this mesh into it’s own component:
components/Cube.tsx:
export default function Cube() {
  return (
    <mesh>
      <boxGeometry args={[1, 1, 1]} />
      <meshStandardMaterial color="#c6a7d2" />
    </mesh>
  );
}
We are going to use a hook (useFrame) from R3F to update the rotation of our mesh every rendered frame, we need the following:
- A reference to our mesh.
- A callback insise our useFrame hook.
import { useFrame } from '@react-three/fiber';
import { useRef } from 'react';
import { Mesh } from 'three';

export default function Cube() {
  const ref = useRef<Mesh>(null!);

  useFrame((state, delta) => {
    if (ref.current) {
      ref.current.rotation.y += 0.8 * delta;
      ref.current.rotation.x += 1.2 * delta;
    }
  });

  return (
    <mesh ref={ref} scale={1.8}>
      <boxGeometry args={[1, 1, 1]} />
      <meshStandardMaterial color="#c6a7d2" />
    </mesh>
  );
}
To reference our mesh we must always use useRef instead of useState, if you use useState that could lead to performance issues when rendering your web.
-
useFrame is a hook that will be call every canvas render, it’s first parameter is a RenderCallback that has two params (state and delta). To sumarize it:
-
State gives general information about your scene, camera, clock, mouse, performance and more.
-
Delta is the time passed since the last frame.
We want our cube rotation to be frame-independent so we are multiplying that value in seconds in our operations.
If you have reached this far and you’re still figuring out what a frame is, I have that answer too:
The rendered frame is a processed final image displayed on screen, when we work with graphics or play videogames, our computer needs to render images to display our content on screen being updated, it happens dozen of times per second, that computation speeds depends on your computer hardware, we made our rotation frame-independent to mantain consistency between computers.
Finally we add our new component in App.tsx:
import { Canvas } from '@react-three/fiber';
import Cube from './components/Cube';

export default function App() {
  return (
    <Canvas style={{ height: '100vh', width: '100%' }}>
      <ambientLight />
      <pointLight position={[10, 10, 10]} />
      <Cube />
    </Canvas>
  );
}
And that’s it, Merlin should be proud of us for making a perfect cube.
You can learn more about React Three Fiber on their official documentation, they have nice examples and performance tips!
References

I came to this planet to do something, meanwhile I entertaint myself making software, I love videogames and 3D too.